Indiana Retirement Reporting
Human Resources > State Requirements > IN > System Settings Maintenance
Human Resources > State Requirements > IN > Retirement List
Link to Indiana State Requirement Reports PDF
The following user-defined fields are required for Indiana Retirement reporting:
| Record Type | Name | Data Type | Values | ||
|---|---|---|---|---|---|
| Employee Employment | IN Credited Days | Numeric | -99.00 | 999 | Only used when the Submission Unit Fund is TRF for Teachers Retirement Fund |
| Employee Employment | IN Last Day in Covered Position | Date | |||
| Employee Employment | IN Submission Unit Fund | Validation Set (404) | Expected values: PERF, TRF, PA, JU, 77 or CD | ||
Human Resources > State Requirements > IN > System Settings Maintenance
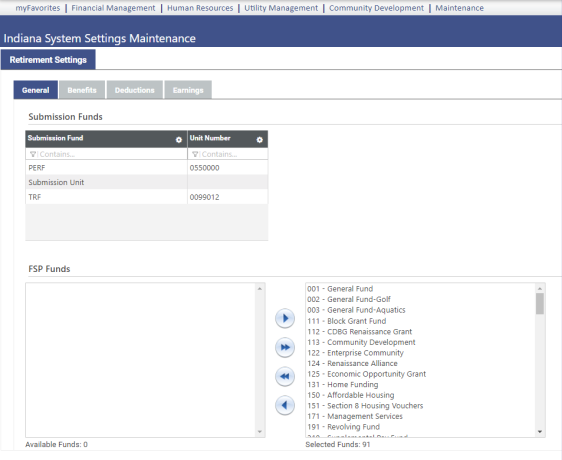
Use the Indiana System Settings Maintenance page to perform the setup needed to create your retirement data. Setup includes the mapping of submission funds to unit numbers, the selection of FSP funds, the mapping of benefit and deduction codes to contribution types, and the flagging of hours codes as excluded or severance.
The page is segmented into four tabs: General, Benefits, Deductions and Earnings. You may click Save after selections have been made on each tab or wait until selections have been made on all tabs.
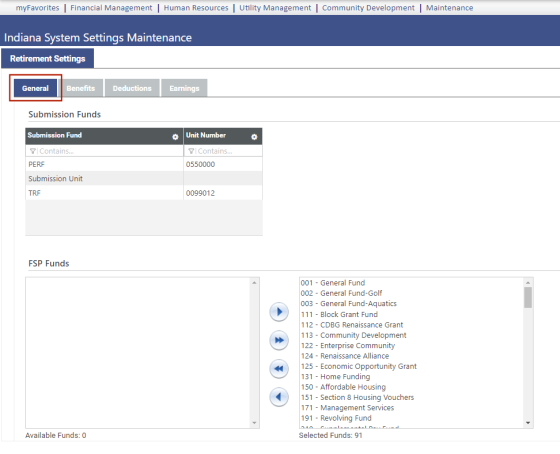
General is the default tab.
For each Submission Fund, fill in the applicable seven-digit Unit Number identifying the retirement data submission.
As shown below, IN Submission Unit Fund, the user-defined field (UDF) that appears on each employee’s Employment tab in Workforce Administration, identifies the employee as belonging to PERF or TRF:
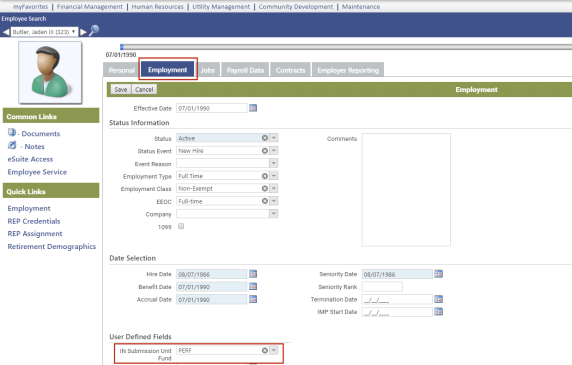
When you create your data, you may create it for PERF employees only, TRF employees only or both types of employees.
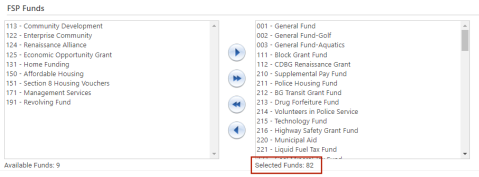
Use the FSP Funds multi-select list boxes to report wages paid as Federally Supported Programs (FSP) separately from other wages in the wage and contribution process.
The Available Funds list box contains the codes and descriptions of all FSP funds available for selection. To select FSP funds for reporting, move them from Available box to the Selected box, as shown below:
Note: To set up FSP funds, navigate to Maintenance > New World ERP Suite > Chart of Accounts > Funds.
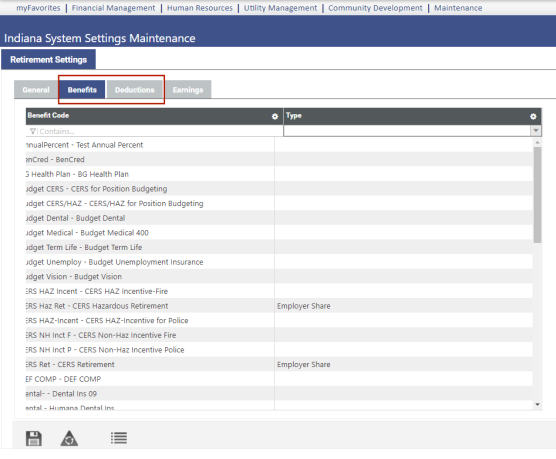
Use the Benefits and Deductions tabs to map benefit and deduction codes to the appropriate contribution types.
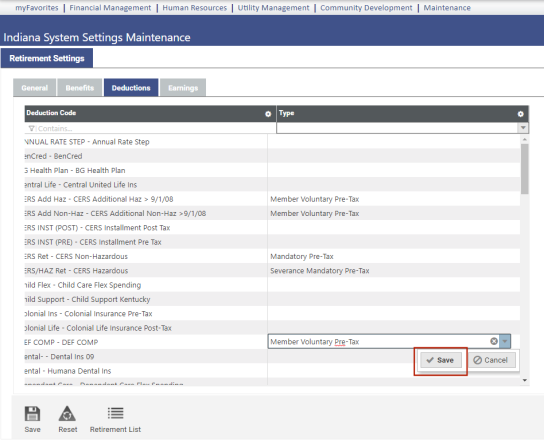
The grid on the Deductions tab contains all deduction codes and associated contribution type codes. The grid on the Benefits tab contains all benefit codes and associated contribution type codes.
To associate a deduction or benefit code with a contribution type, double-click in the corresponding Contribution Type cell, and select the contribution type you want from the drop-down.
To save each selection, click outside the cell, or click the Save button:
The selections available in the Type drop-downs come from validation set 630-Indiana Retirement Contribution Type. To view or update the validation set from the grid, double-click in a Type cell, press <Ctrl> and click in the cell:

Note: Validation sets already have been set up for you at Maintenance > New World ERP Suite > System > Validation Sets > Validation Set List.
If you select a contribution type by mistake, click the X on the right side of the cell to remove it from the cell.
Each deduction or benefit code that needs to be included in the contributions must have a contribution type to go with it.
The following contribution types are available on the drop-down:
- Employer Share
- FSP-Federally Supported Program
- HEP-Higher Education Program
- Mandatory Post-Tax
- Member Voluntary Post-Tax
- Member Voluntary Pre-Tax
- Severance Employer Share
- Severance Mandatory Post-Tax
- Severance Mandatory Pre-Tax
- Severance Member Voluntary Post-Tax
- Severance Member Voluntary Pre-Tax
Each contribution type may be associated with more than one deduction or benefit code.
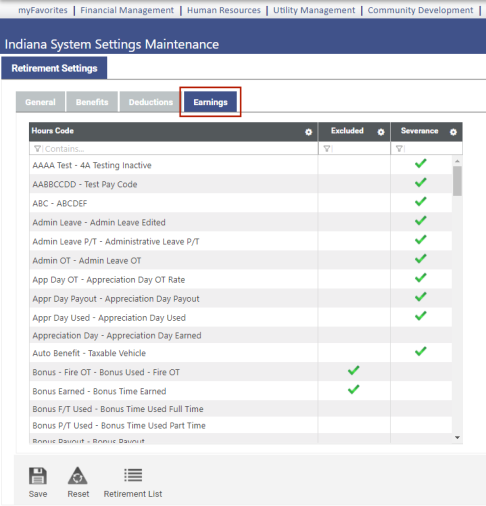
Use the Earnings tab to flag hours codes as Excluded from Indiana retirement or as Severance.
Excluded hours will exclude from pensionable wages only.
Note: To navigate back and forth from system settings page to the Indiana Retirement List page while performing setup and running reports, use the Retirement List button  on this page and the Settings button
  on the retirement list page.
Human Resources > State Requirements > IN > Retirement List
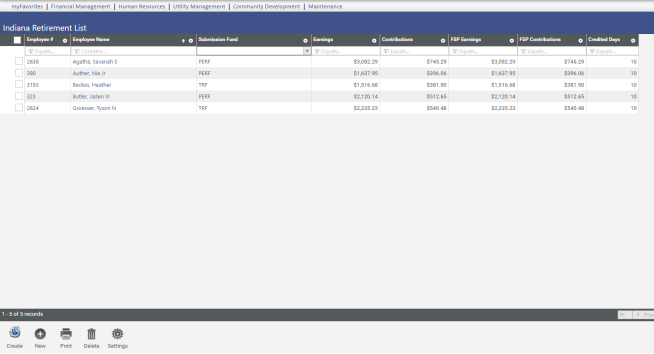
Use the Indiana Retirement List page to review and modify retirement data for each employee within the organization, create new data and generate a report and transmittal file of the data. The transmittal file may be submitted to the state each pay period.
The grid on this page contains retirement data from the last time the work file was created, with each row in the grid corresponding to an employee record. If you are running this process for the first time, the grid will be empty.
Each row of the grid corresponds to an employee record within a system and contains the employee’s submission fund, earnings, contributions, FSP earnings, FSP contributions and credited days.
To delete a row from the grid, select the row, and click the Delete button, located in the bottom border of the grid.
To edit data for an employee, click the Employee name in the Indiana Retirement List. To add an employee to the Indiana Retirement List, click the New button, select the Employee from the drop-down on the Add Employee dialog (the drop-down contains all employees who have selections in the IN Submission Fund UDF in Workforce), and click Ok. In either instance, the Indiana Retirement Entry page opens:
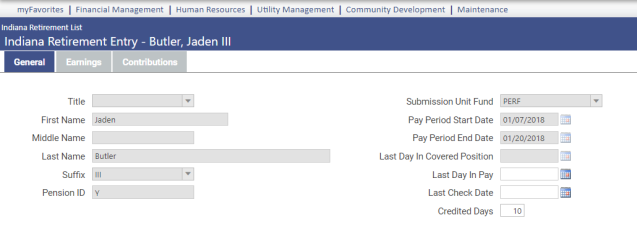
The employee’s general information, earnings and contributions appear on three separate tabs.
On the General tab, the pay period dates from the create process and fields containing data from Workforce are disabled.
Use the Last Day in Pay and Last Check Date fields for a terminated employee.
If credited days for the employee should be something different from the Default Credited Days entered in the create retirement data process (next section) or the IN Credited Days UDF in Workforce Administration, enter the number in the Credited Days field.
The Earnings and Contributions tabs contain grids showing the employee's earning and contribution types and corresponding amounts in individual rows:
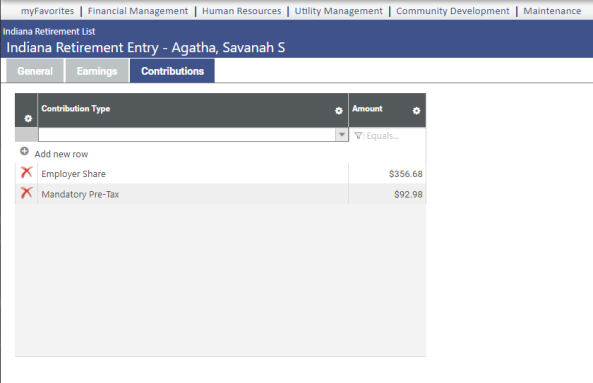
Note: When you are adding an employee to the Indiana Retirement List, the Earnings and Contributions tabs remain disabled until you have selected the pay period start and end dates and clicked Save.
To create a new file of retirement data, click the Create button, located in the bottom border of the grid. (If data already exists, a pop-up lets you know and gives the option to continue.) The Create IN Retirement Data dialog opens:
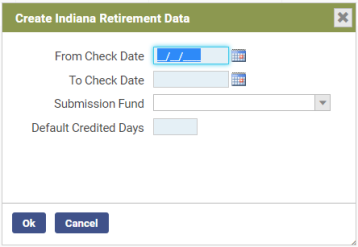
Select a From Check Date and To Check Date.
In the Submission Fund field, select whether to create data for PERF or TRF employees only, or leave the field blank to create data for all PERF and TRF employees.
Fill in the Default Credited Days. If you have created a Credited Days UDF for the Employment tab in Workforce Administration, an entry in that field overrides the one here.
To generate the Indiana Retirement Report and transmittal file containing the latest retirement data, click the Print button, located in the bottom border of the grid on the Indiana Retirement List page. You may print a summarized or detailed report with PERF employees only, TRF employees only or both.
After generating, the report and transmittal file are sent to myReports, the report as a PDF, the transmittal file as a text file.
Sample Indiana Retirement Report (Summary)

Sample Indiana Retirement Transmittal File
To view the transmittal file, click the Indiana Retirement Transmittal File in myReports. A .txt button displays in the bottom-left border of the page. Click this button to view or save the file:
![]()
Note: To navigate back and forth from retirement list page to the Indiana System Settings Maintenance page while performing setup and running reports, use the Settings button  on the retirement list page and the Retirement List button on the system settings page.